Why Patios Sink Uneven on Expansive Clay Soil, and How to Level Yours
If you live in Des Moines, you have probably noticed how patios sink uneven on expansive clay soil, one corner dropping while the rest stays put. The good news: a sunken patio almost never needs full replacement. Concrete leveling can lift the slab back into place for a fraction of the cost, restore a safe surface for kids and guests, and bring back the look you want when it is time to entertain or sell. This guide walks you through the fix step by step, including how to document the damage and file a sunken patio insurance claim.
Why Patios Sink Uneven: Expansive Clay Is the Root Cause
Patios sink uneven because the soil beneath them moves, and central Iowa's expansive clay moves more than most. Clay swells when it soaks up water and shrinks when it dries out. That constant expand-and-shrink cycle pulls support out from under one edge of the slab before another, which is why patios tip and tilt instead of sinking evenly.
Three soil problems cause most of the settling you will see:
- Natural compaction. Backfill around a home keeps compressing for years after construction. Patios poured over loose fill sink as the ground beneath them packs down.
- Washout. Water from a downspout or a poorly graded yard runs under the slab and carries soil away. The slab loses support and drops into the gap.
- Drought shrinkage. In a dry summer, expansive clay shrinks and pulls away from the underside of the slab, leaving a void the concrete eventually settles into.
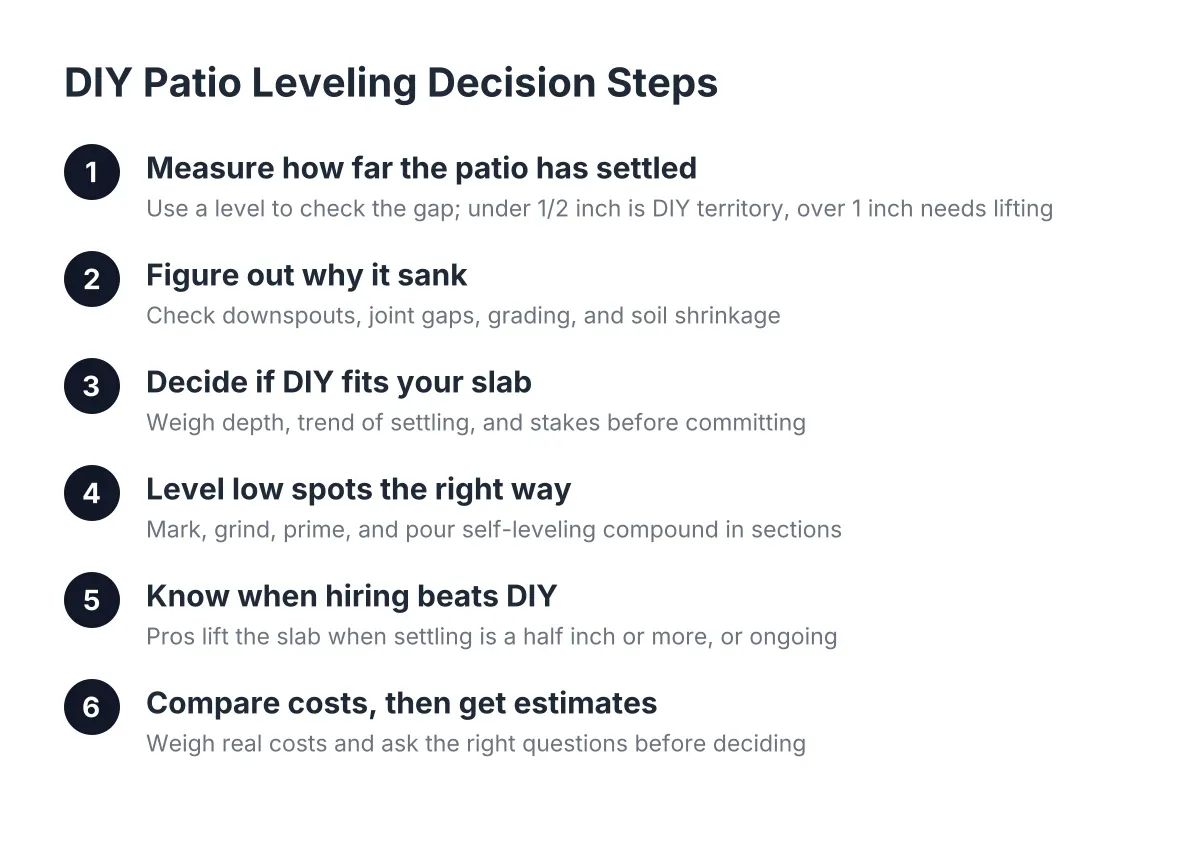
Sloped lots make it worse. Soil migrates downhill over time, so the low side of a patio often drops first. Understanding which of these is happening at your house matters, because leveling the slab without fixing the water problem invites the same settling again.
Here is the trap homeowners fall into: they assume a full tear-out and repour solves it. It does not. Replacing a settled slab does not fix the soil or drainage problem underneath, so a brand-new patio can sink the same way the old one did. The fix that lasts is lifting the existing slab and correcting what made the ground give way.
Step 1: Document the Damage Before Filing a Sunken Patio Insurance Claim
First, photograph everything before a crew touches the patio. If you plan to file a sunken patio insurance claim, your adjuster will want dated photos showing the condition before repair. Take wide shots of the whole patio, close-ups of every crack, and a photo with a level or tape measure showing how far the slab has dropped.
Note when the sinking started or got worse. Insurers treat sudden damage differently than gradual settling. If a heavy spring rain or a hard freeze-thaw cycle made the patio drop noticeably, write down the date and save any weather records you can find. Most homeowner policies exclude normal settling, so tying the damage to a specific event is the strongest case you can make.
Be honest with yourself here, though. Many patio claims get denied because settling from expansive clay counts as gradual earth movement, which standard policies exclude. A sunken patio insurance claim often faces denial when the damage reflects normal soil behavior. Plan your budget as if you are paying out of pocket, and treat any reimbursement as a bonus. A conversation with your agent before repair costs you nothing and prevents surprises.
Step 2: Get a Written, Itemized Estimate You Can Hand to an Adjuster
Next, request an estimate that describes the problem in plain terms an adjuster can use: square footage of the settled area, how many inches the slab dropped, the suspected cause, and the repair method. A one-line quote that says "level patio" does not help a claim. An itemized estimate that says "lift 120 square feet of sunken patio slab settled 2 inches at the southwest corner due to soil washout from downspout discharge" gives the adjuster something to work with.
Ask whether the contractor will note the likely cause of settling in writing. A local concrete leveling specialist who works Des Moines clay every week can usually tell you whether the culprit is washout, compaction, or shrinkage just by looking at the drainage and the crack pattern. That written cause matters for your claim and for preventing a repeat.
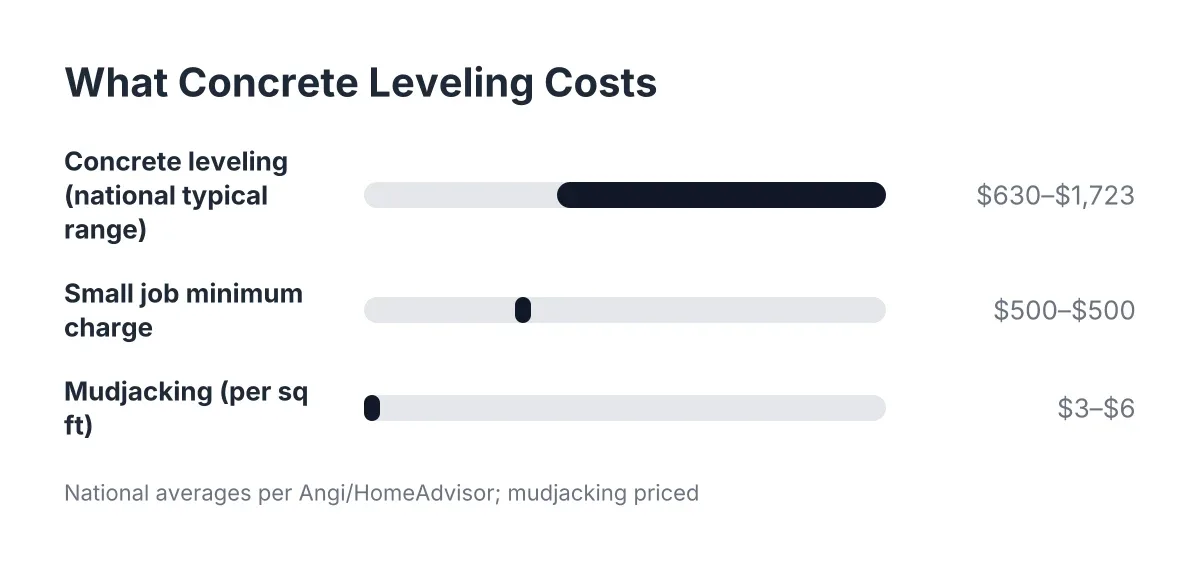
For rough budget context while you wait on the adjuster, the national average concrete leveling cost is $1,174, with a typical range of $630 to $1,723, according to Angi and HomeAdvisor data. Small jobs may carry a minimum charge of around $500 even if the area is under 100 square feet, according to Angi. Obstacles like fences, buried drainage pipes, or an adjoining slab can push a quote higher, so mention those when you call.
Step 3: Choose the Right Leveling Method for Your Slab
Two methods lift sunken concrete: mudjacking and polyurethane foam injection. Both work the same basic way. According to Wikipedia, concrete leveling works by drilling holes into the sunken slab, pumping a lifting material beneath it to raise and stabilize the slab, then patching the holes to closely match the original surface.
Which one fits depends on your slab:
- Mudjacking pumps a cement-based slurry under the slab. It suits heavier slabs and larger voids, and per HomeAdvisor it runs $3 to $6 per square foot, which is 25% to 50% less than replacing the slab entirely.
- Polyurethane foam uses smaller holes and cures fast, often letting you walk on the patio the same day. It costs more per square foot but leaves less visible patching, which matters if the patio is a showpiece.
For a patio you host on, the smaller patch holes from foam may be worth the premium. For a plain back slab hidden behind the garage, mudjacking usually wins on price. A cracked slab changes the math too; concrete broken into small pieces may not lift cleanly with either method, and an honest contractor will tell you when leveling is not the right call.
One note on a common mix-up: self-leveling concrete is an indoor product for smoothing floors before flooring goes down, not a fix for a sunken outdoor patio. It cannot lift a slab or fill the void underneath it.
Step 4: Fix the Drainage So the Patio Stays Level
Leveling puts the slab back where it belongs. Drainage keeps it there. Since expansive clay reacts to every wet-dry swing, controlling water around the patio is the single best thing you can do after the lift.
Work through this checklist within a week or two of the repair:
- Extend downspouts at least 5 feet past the patio edge so roof water cannot run under the slab.
- Regrade any soil that slopes toward the patio; water should flow away from it.
- Seal the joint where the patio meets the house foundation with a flexible caulk.
- Have new and existing cracks filled. Crack filling blocks the water that erodes soil beneath the slab.
For example, suppose a homeowner in Beaverdale has a patio corner that dropped 2 inches after a wet April. Say the estimate comes in around $900 for the lift, the adjuster denies the claim as gradual settling, and the downspout dumping next to that corner turns out to be the cause. In that scenario, a $15 downspout extension is the difference between a fix that holds and paying for the same repair again in three years.
Step 5: Handle Cracks, Joints, and Surface Appearance
After the lift, deal with what settling left behind. Hairline cracks that opened while the patio was sinking should get crack repair so water stays out. If freeze-thaw cycles have pitted or flaked the surface, resurfacing can give the patio a uniform finish without pouring new concrete.
If your patio is pavers rather than a poured slab, the playbook differs. Sunken pavers get pulled, the base gets rebuilt and compacted, and the pavers go back down. Sweep polymeric sand into the joints afterward; it hardens with water and blocks the joint washout that lets pavers shift again. Anyone researching how to lay pavers over Des Moines clay should plan on a thicker compacted base than national guides suggest, because our soil moves more than the sandy ground those guides assume.
This is also where patio leveling pays off beyond safety. A patio that sits flat, drains right, and has clean joints reads as a well-maintained home to a buyer or an insurance inspector. According to Angi, concrete leveling projects can recoup 70% to 90% of their cost in added home value. Few repairs in the $600 to $1,700 range return that much.
Step 6: Know When Leveling Is Not the Answer
Concrete leveling fixes sunken and uneven concrete. It does not fix everything. Skip leveling and get a different professional opinion when:
- The slab is shattered into many small pieces rather than settled in large sections.
- The sinking connects to foundation movement in the house itself; uneven interior floors alongside a sinking patio call for a structural inspection, not just slab work.
- The concrete is badly deteriorated throughout, where lifting would just raise a slab that is falling apart.
If replacement truly is the answer, run a concrete calculator to estimate material volume before you collect bids, so you can sanity-check what contractors quote. Even then, remember the soil rule: a new pour over the same unstable clay without drainage fixes will settle the same way.
What to Expect on Repair Day
A typical crew finishes a patio lift in a few hours. They drill a pattern of holes, pump material until the slab rises back to grade, check it with a level, and patch the holes. Mudjacking needs a day or so before heavy use; foam is usually ready the same day. Keep your before photos, the itemized estimate, and the paid invoice together in one folder. Whether your claim pays out or not, that file documents the repair for your insurer, a future buyer, or a home inspector.
Patios sink uneven on expansive clay because the ground moves, not because the concrete failed. Lift the slab, fix the water, and seal the cracks, and a patio that looked like a tear-out candidate goes back to being the flattest, safest spot in the backyard.
If you need concrete leveling, Des Moines Concrete Leveling Pros can help.
Prefer to talk it through? Call +15155828701 — a quick call is usually the fastest way to get a straight answer for your situation.