DIY Patio Leveling: When to Level It Yourself vs. Hire a Pro in Des Moines, IA
If your inspector flagged a sunken patio, or your realtor said the backyard looks rough in the listing photos, you have two paths: DIY patio leveling with a level, a bag of compound, and a free weekend, or hiring a concrete leveling crew to lift the slab. Both can work. The trick is knowing which fits your patio, your timeline, and your closing date. This guide walks you through the decision step by step, so you fix the problem once instead of paying for it twice.
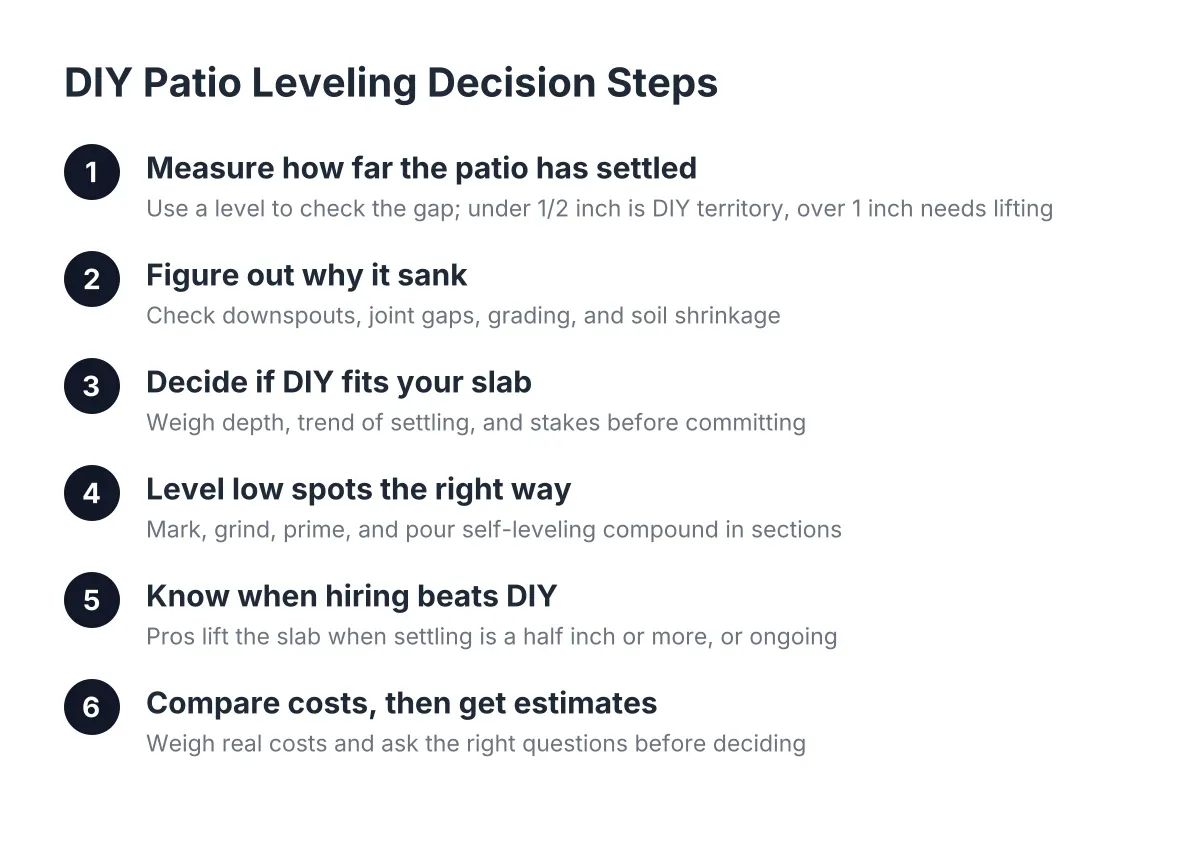
Here is the short version. Surface problems under about half an inch are fair game for DIY. A slab that has settled an inch or more needs lifting, and that is professional work. Everything below helps you tell the difference.
Step 1: Measure How Far the Patio Has Settled
Grab a 4-foot level or a straight board and lay it across the slab. Measure the gap at the low end. Do this in a few spots, especially where slab sections meet and where the patio ties into the house or a walkway.
Write the numbers down. This single measurement drives the whole decision:
- Under 1/2 inch of unevenness: surface fix territory. Self-leveling concrete or resurfacing can handle it.
- 1/2 inch to 1 inch: borderline. A surface fix may work, but if the slab is still sinking, the problem comes back.
- Over 1 inch, or a clear tripping hazard between sections: the slab has settled and needs to be lifted, not coated.
Central Iowa's expansive clay soil is why this matters. Clay swells when wet and shrinks when dry, and freeze-thaw cycles make it worse. If the soil under your patio is still moving, pouring compound on top is like painting over rust.
While you measure, check the slab's condition too. Hairline cracks are normal. A slab broken into many loose pieces, or crumbling at the edges, may be past leveling and closer to replacement.
Step 2: Figure Out Why It Sank
Next, look for the cause. A patio does not sink for no reason. Walk the perimeter and check these:
- Downspouts dumping water next to the slab, washing out the soil beneath it
- Gaps or open joints between the patio and the house where water runs under the slab
- Poor grading that sends rainwater toward the patio instead of away
- Soil shrinkage from drought summers, common in Des Moines clay
If you level the patio without fixing the water problem, it sinks again. That is true whether you DIY or hire a crew. Extend the downspouts, seal the joints, and fix the grade either way. For joint gaps, sweep in a polymeric sand alternative such as a flexible joint sealant rated for concrete; it stays put through freeze-thaw better than loose sand.
Step 3: Decide If a DIY Patio Leveling Approach Fits Your Slab
DIY patio leveling makes sense when the slab is structurally sound, the low spots are shallow, and the soil underneath has stopped moving. In practice that means birdbath puddles, a slightly wavy surface, or a worn top layer. It does not mean a slab that has dropped an inch at the house and keeps dropping.
Be honest about three things before you commit:
- Depth. Self-leveling compound is made for shallow corrections, not raising a sunken slab back to grade.
- Trend. If the gap has grown over the past year, the soil is still settling. A surface fix will crack.
- Stakes. If you are selling, a failed DIY attempt flagged by the buyer's inspector costs you more than doing it right the first time.
There is a real downside risk here. A botched DIY job can damage the slab and make professional leveling harder later, sometimes forcing full replacement instead of a repair. If you are unsure, get an estimate first; most concrete leveling companies in Des Moines, IA will tell you plainly whether your patio is a lifting job or a coating job.
Step 4: If You DIY, Level the Low Spots the Right Way
Suppose your patio passes the test: solid slab, low spots under half an inch, water problems fixed. Here is how the DIY route works.
First, find the low spots with your level and mark them with chalk. Not every square foot needs compound; you only fill where the level shows a gap. For a noticeably sloped area, some installers set small screws in the slab as height references, leveled with a laser, so they have a guide while pouring.
Then prep the surface. Manufacturer instructions for self-leveling compound typically require the concrete to be mechanically profiled before the leveler goes down, according to Lowe's (Self-Leveler Plus installation guide). That means grinding or scarifying so the compound can grip. Clean off all dust, then prime. Using a primer on porous concrete also cuts down on air bubbles rising from the slab into the compound, according to Ardex.
Mix and pour in sections, and wear a respirator; the dry powder is hazardous to breathe, according to Sakrete. One common misconception: self-leveling compound does not level itself. You still have to spread and work it with a gauge rake or trowel. If a spot ends up slightly high, you can grind it down after it cures, or leave it if the difference is minor.
Budget a weekend, plus material costs that climb fast on a large patio. Outdoor pours also need a compound rated for exterior use and the right weather window, which in Iowa rules out a good chunk of the year.
Step 5: Know When Hiring Beats a DIY Patio Leveling Level Job
Hiring a concrete leveling crew beats a DIY patio leveling project whenever the slab has dropped half an inch or more, the settling is ongoing, or you are on a deadline such as a closing date. Professionals lift the existing slab back to grade; DIY compound only smooths the top. Those are different repairs for different problems.
Professional concrete leveling works by drilling small holes in the sunken slab, pumping a lifting material underneath to raise and stabilize it, then patching the holes to blend with the surface, as described by Wikipedia. In Des Moines that lifting material is either a cement slurry (mudjacking) or polyurethane foam, and each has its place depending on slab condition, load, cure time, and cost.
Hire a pro when any of these apply:
- The patio has settled an inch or more, or one section sits well below its neighbor
- You see a tripping hazard where the patio meets a walkway or step
- A home inspector flagged the sunken slab and you need it fixed before closing
- The settling has gotten worse over the past year
- You own rentals and a tenant has complained about uneven concrete
For a pre-listing seller, speed matters as much as the fix. Most residential lifting jobs wrap up in hours, and the patched holes read as a repaired slab, not a construction zone. That is usually enough to clear an inspection note about sunken concrete, though the buyer's inspector makes the final call, and no contractor can promise what an inspection will say.
Step 6: Compare the Real Costs Before You Decide
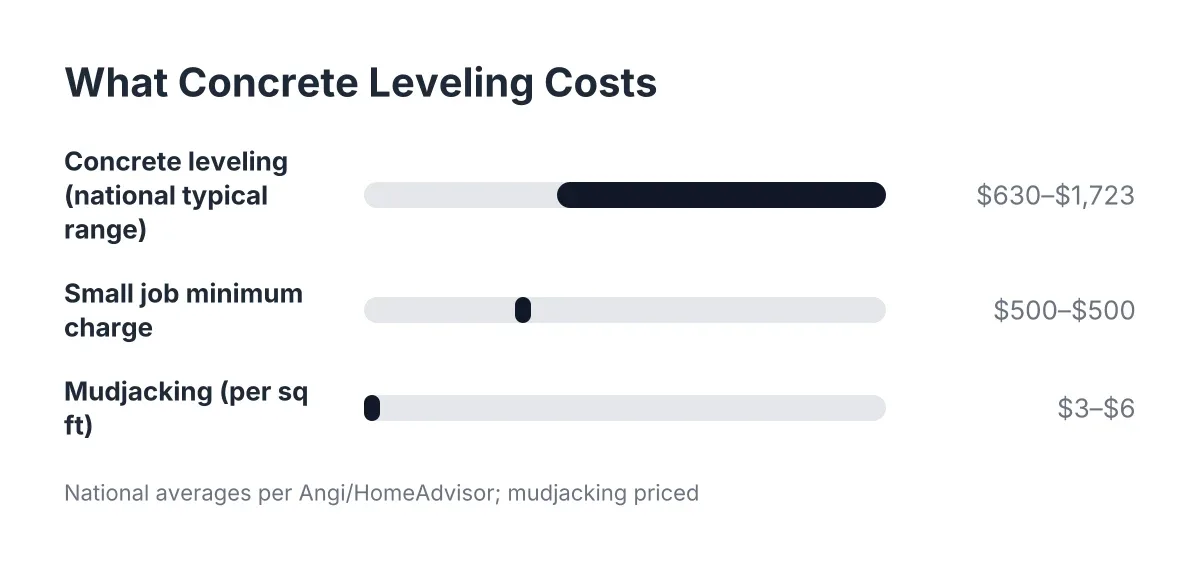
Put numbers next to both options. As of 2026, the national average concrete leveling cost is $1,174, with a typical range of $630 to $1,723, according to Angi and HomeAdvisor data. Mudjacking runs $3 to $6 per square foot and costs 25% to 50% less than replacing the slab entirely, according to HomeAdvisor. Small jobs may carry a minimum charge around $500 even under 100 square feet, according to Angi.
Two more numbers matter for sellers and landlords. Concrete leveling projects can recoup 70% to 90% of their cost in added home value, according to Angi. And the amount of lift drives price: a slab needing one inch of lift costs far less than one that sat for years and dropped four inches. Fixing it early is the cheap version.
For example, say a landlord owns a duplex on the south side of Des Moines with a back patio that dropped an inch at one corner, and a tenant mentioned it at lease renewal. In that scenario, a professional lift might land in the high hundreds to low four figures, while DIY compound would cost less up front but would not raise the slab or remove the liability. For a rental, the lifting job is usually the better spend.
One logistics note: leveling equipment typically stages in the driveway or street for the whole job. A backyard patio that requires running hoses around the house or through a gate can add to the cost, so mention access when you request estimates.
Step 7: Get Estimates and Ask the Right Questions
Finally, if the measurements point to hiring, get two or three estimates before you commit to any patio leveling method. Ask each company:
- Do you recommend mudjacking or polyurethane foam for this slab, and why?
- How much lift does my patio need, and can you reach it without cracking the slab?
- What is the cure time before we can walk on it or stage the yard for showings?
- What happens to the drill holes, and how closely will the patches match?
- Will you look at my drainage so the slab does not settle again?
A straight answer to the first question is the best trust signal you will get. A specialist should explain when each method fits rather than push one answer for every patio. If the slab is too far gone to lift, a good estimator will say so instead of selling you a repair that will not hold.
The bottom line: use your level before you use your wallet. Shallow, stable low spots are a fair DIY patio leveling project with a level, compound, and patience. A sunken slab on moving Des Moines clay is a lifting job, and lifting is what keeps the repair from showing up on the next inspection report.
If you need concrete leveling, Des Moines Concrete Leveling Pros can help.
Prefer to talk it through? Call +15155828701 — a quick call is usually the fastest way to get a straight answer for your situation.