Mudjacking Mud Composition: What’s in the Clay Slurry Under Your Slab
If you're getting mudjacking done on a Des Moines driveway or walkway, it helps to know what actually goes under the slab. Mudjacking mud composition starts with clay or native soil, then adds sand, water, and often Portland cement. That mix, called a slurry, gets pumped through drilled holes to lift sunken concrete back into place.
This matters more than it sounds. The mix decides how well the lift holds, how heavy the material is once it dries, and what shows up on the written estimate you hand your insurance adjuster. Here is a step-by-step walkthrough of how the slurry is built and pumped, written the way a crew that works in central Iowa soil would explain it, not a franchise script.
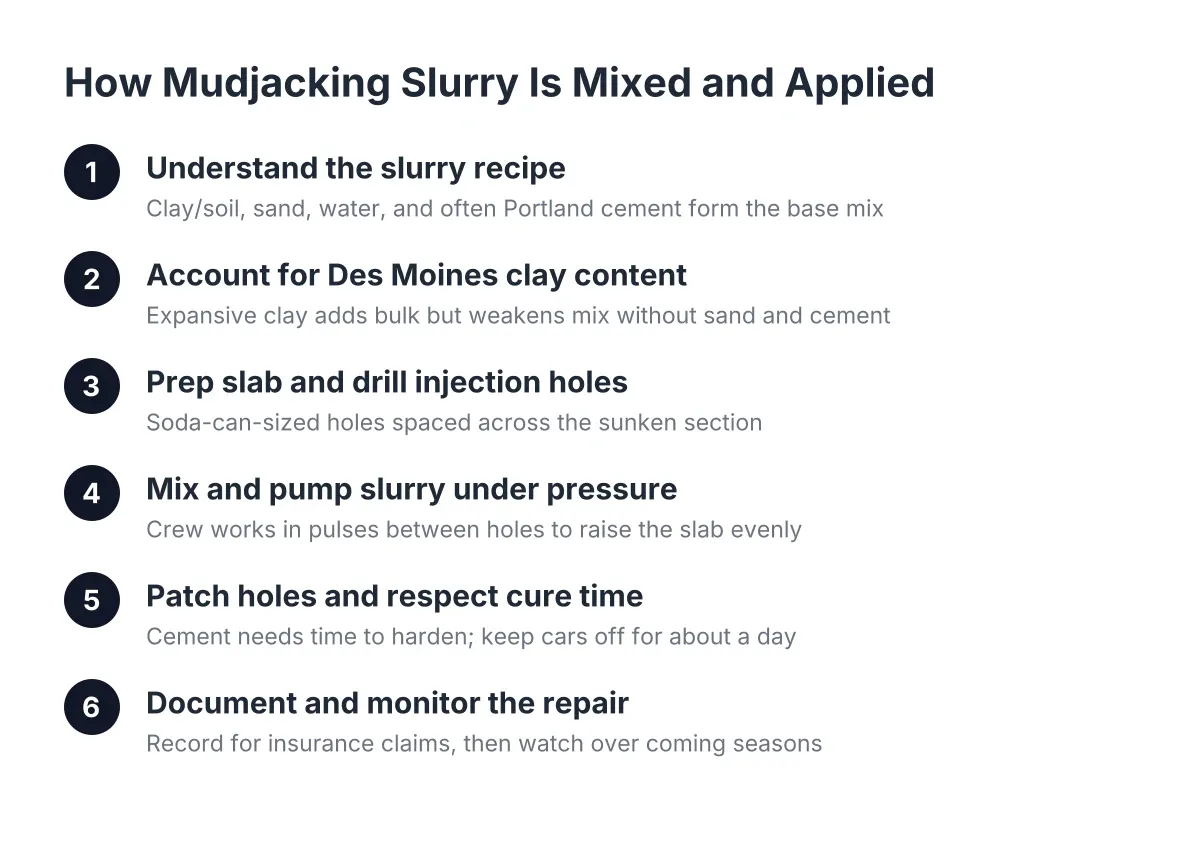
Step 1: Understand What Goes Into the Mudjacking Slurry
Before any pumping starts, know the recipe. A traditional mudjacking slurry combines three or four things:
- Native soil or clay as the base bulk material
- Sand to add body and help the mix flow through the hose
- Water to turn it into a pumpable slurry
- Portland cement, often added so the mix hardens into a stable, load-bearing fill
The exact ratio changes from job to job. A wetter mix flows farther under the slab and fills voids better. A stiffer mix lifts with more control. Crews adjust on site based on how the slab responds, which is one reason this work is hard to do yourself.
For comparison, professional concrete leveling generally uses one of three material types: the traditional soil-and-sand mudjacking slurry, a stone slurry grout made from pulverized limestone and water, or a two-part polyurethane concrete lifting foam. Mudjacking is the lowest-cost of the three, but it also has the lowest material strength. Stone slurry sits in the middle on price and offers strong void filling. Foam is the lightest and cures fastest.
Step 2: Know How Clay Content Affects Mudjacking Mud Composition in Des Moines Soil
Central Iowa sits on expansive clay. That clay swells when it soaks up spring rain and shrinks when it dries out in August. Add freeze-thaw cycles from November through March, and you get the settling that sinks driveways and garage floors across the metro in the first place.
Clay plays two roles here. It is part of the problem under your slab, and it is part of the mudjacking mud composition itself. Clay in the slurry adds bulk cheaply, but too much clay makes a mix that can shrink or soften if water reaches it later. That is why a good crew balances clay-heavy soil with sand and cement instead of pumping straight mud.
Therefore, when you get an estimate, ask what the mix includes. A slurry with cement in it cures into a hard, concrete-like fill. A soil-only mix without cement is cheaper but weaker, and it can settle again sooner. For an insurance claim, a written estimate that names the material gives the adjuster something concrete to evaluate.
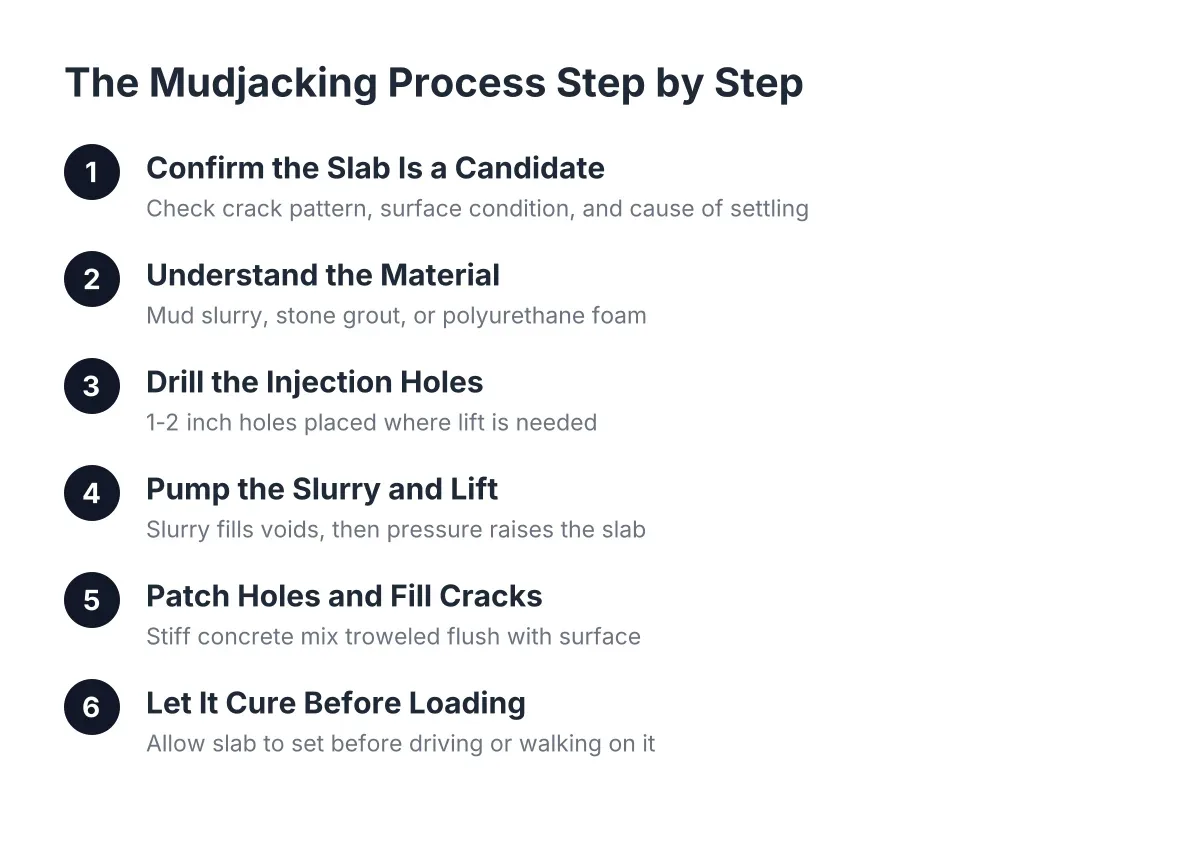
Step 3: Prepare the Slab and Drill the Injection Holes
On job day, the crew inspects the slab first. Badly shattered concrete cannot be lifted; it needs replacement or resurfacing instead. If the slab is sound but sunken, the crew marks hole locations, usually every few feet across the settled section.
Next, they drill holes through the slab, typically about the size of a soda can. According to Wikipedia, concrete leveling works by drilling holes into the sunken slab, pumping a lifting material beneath it to raise and stabilize the slab, then patching the holes to closely match the original surface. Mudjacking holes run larger than the dime-sized holes used for foam injection, because the thicker slurry needs a wider path.
Hole placement matters. Drill too close to an edge and the slab can crack during the lift. Space the holes wrong and one side rises while the other stays put.
Step 4: Mix and Pump the Slurry Under Pressure
Now the actual lift. The crew mixes the slurry on site, loads it into a pump, and forces it through the drilled holes under pressure. The material spreads beneath the slab, fills the voids the settled soil left behind, and then starts pushing the concrete upward.
The operator works in small pulses, moving between holes to raise the slab evenly. High-pressure pumping can be hard to control, so an experienced hand matters; lift too fast in one spot and you crack the slab you are trying to save. A careful lift brings a sunken driveway section back within a fraction of an inch of its neighbor, closing the tripping hazard.
For example, suppose a landlord owns a duplex on the south side of Des Moines and a tenant reports a front walkway slab that has dropped two inches at the joint. In that scenario, a typical crew drills four to six holes, pumps slurry until the slab meets the adjacent section, and finishes the same morning. The tenant's tripping hazard is gone before the next showing, and the landlord has a dated, itemized invoice for their records.
Step 5: Patch the Holes and Respect the Cure Time
After the lift, the crew fills the drill holes with a concrete patch mixed to sit flush with the surface. The patches stay visible up close, since new concrete never matches weathered concrete exactly. On a driveway they fade into the background within a season or two.
However, mudjacking slurry needs time to harden. The cement in the mix has to cure before the fill reaches full strength. Plan on keeping cars off a mudjacked driveway for a day or so, though foot traffic is usually fine much sooner. Ask your crew for their specific guidance, because cure time shifts with the mix and the weather.
This is one honest trade-off versus foam. Concrete lifting foam cures in minutes and you can often drive on it the same day. The mud slurry takes longer but costs less per square foot, which is why mudjacking a driveway remains the budget pick for large slabs in 2026.
Step 6: Document the Job for an Insurance Claim
If you are filing a claim, the paperwork matters as much as the lift. Most standard homeowner policies treat gradual settling as normal wear, not a covered peril, so many claims for sunken concrete get denied. Coverage questions come down to your specific policy and what caused the movement, and only your insurer or agent can answer them. Do not let a contractor promise you coverage.
That said, you can stack the deck with good documentation. Ask for:
- A written estimate that describes the work as concrete leveling or slab jacking, names the material (cement-based mudjacking slurry), and lists the square footage
- Photos of the sunken concrete before the lift, ideally with a level or tape measure in frame
- A note on the likely cause, such as soil washout after heavy rain versus long-term settling
- An itemized final invoice with the date of service
Cost figures help the adjuster too. According to HomeAdvisor, mudjacking runs $3 to $6 per square foot and costs 25% to 50% less than replacing the slab entirely. According to Angi, the national average job falls between $661 and $1,871, most homeowners pay around $1,232, and small jobs may carry a minimum charge of about $500 even under 100 square feet. Those numbers give your claim context: leveling is the cheaper fix, and adjusters notice that.
Step 7: Watch the Repair Over the Next Few Seasons
A mudjacking lift is only as stable as the soil under it. The cured slurry is heavy, far heavier than foam, and if the clay beneath it keeps washing out or shifting, the added weight can contribute to future settling. Watch the repaired slab through a full freeze-thaw cycle and after the first heavy spring rains.
In addition, fix the water problem that caused the settling. Extend downspouts away from the slab, seal joints, and keep crack filling current so runoff cannot reach the soil below. A lift without drainage fixes is a repair on a timer.
For landlords with several properties, a seasonal walkthrough is the cheap insurance here. Catching a half-inch drop at a rental walkway costs a few hundred dollars to level. Waiting until a tenant trips costs far more than any slurry mix ever will.
Quick Reference: Mudjacking Mud Composition and Clay at a Glance
- The slurry mixes native soil or clay, sand, water, and usually Portland cement
- Cement in the mix hardens the fill; soil-only mixes are cheaper but weaker
- Central Iowa's expansive clay causes the settling and shapes how crews build the mix
- Holes are drilled, slurry is pumped under pressure, and holes are patched flush
- Cure time runs about a day for vehicle traffic; foam cures faster but costs more
- Get a written, itemized estimate naming the material if you plan to file a claim
Knowing what is in the mix will not lift your driveway, but it will help you read an estimate, question a vague quote, and hand your adjuster paperwork that holds up. That is worth ten minutes before the pump truck shows up.
If you need concrete leveling, Des Moines Concrete Leveling Pros can help.
Prefer to talk it through? Call +15155828701 — a quick call is usually the fastest way to get a straight answer for your situation.