Mudjacking DIY: What the Process Involves and Why It’s Hard to Do Yourself
You searched "mudjacking diy" because a slab at your Des Moines home sank and you want to know if this is a job you can handle before you pay someone else to do it. Fair question. The best way to answer it is to walk through what mudjacking actually is, what goes under the slab, and what each step of the process looks like on a real driveway. Once you see the mechanics, you can judge for yourself where the do-it-yourself line sits.
Here is the short version. Mudjacking raises sunken concrete by pumping a heavy slurry of sand, soil, water, and often Portland cement through drilled holes in the slab. The pressure of the slurry lifts the concrete back to grade, then the material hardens underneath and holds it there. Simple to describe. Harder to control than it sounds.
This guide walks through the process step by step, the way a crew would run it on central Iowa's expansive clay soils. Along the way, we will flag where a homeowner attempting mudjacking DIY runs into trouble, and where hiring it out makes more sense than renting equipment.
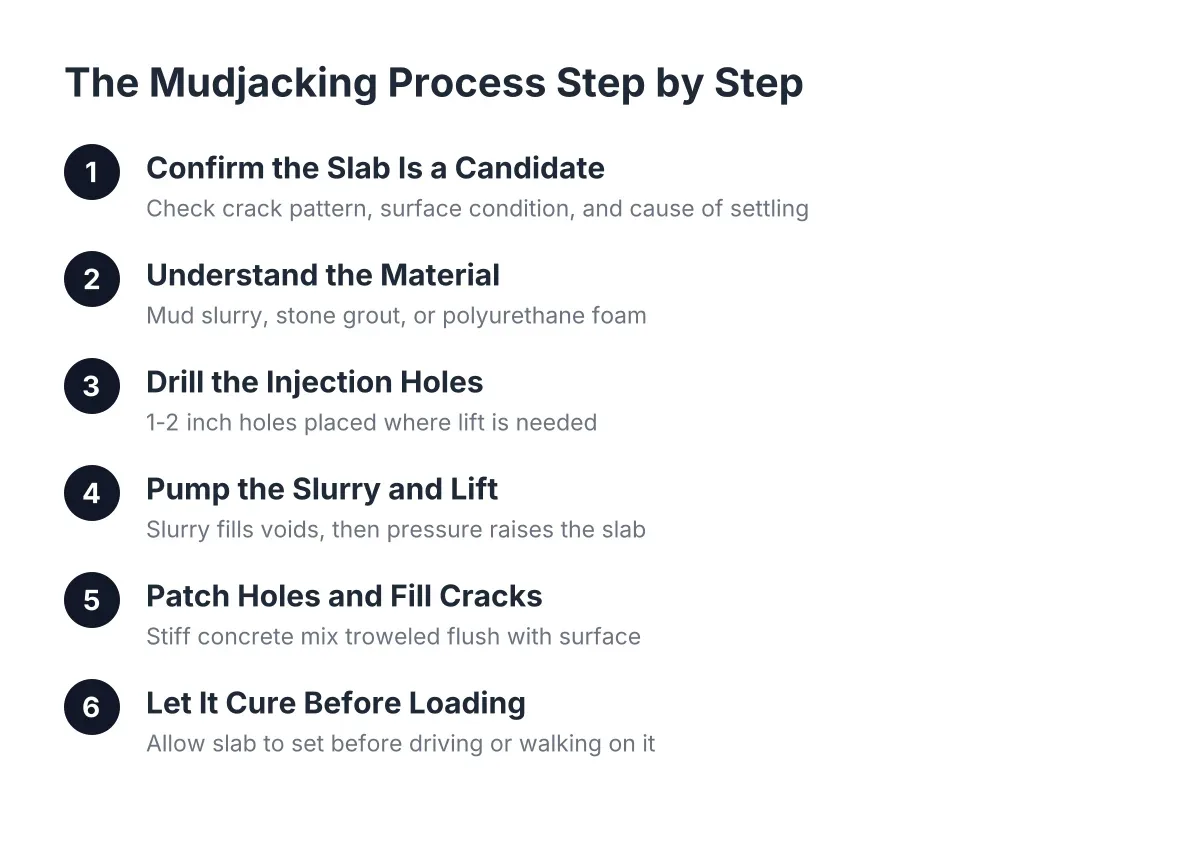
Step 1: Confirm the Slab Is a Candidate for Lifting
Start by checking whether the slab can be lifted at all. Mudjacking works on slabs that sank in one piece or in a few large pieces. It does not work on concrete that has crumbled, shattered into small chunks, or heaved upward from tree roots.
Walk the slab and look for three things:
- Crack pattern. One or two clean cracks are fine. A spiderweb of cracks means the slab may break apart under lifting pressure.
- Surface condition. Heavy spalling or scaling suggests the concrete itself is failing. Lifting a failing slab wastes money; resurfacing or replacement fits better.
- Cause of settling. In Des Moines, most settling comes from expansive clay that shrinks in drought and swells when wet, plus freeze-thaw cycles and washout under downspouts. If water is still washing soil out from under the slab, fix the drainage first or the slab will sink again.
This first check matters for insurance-minded homeowners too. Most standard policies treat gradual settling as normal wear, not a covered loss, but a sudden event like a plumbing leak washing out the base can change that. Get the cause documented in writing before any work starts; a written estimate that names the cause of settling is what an adjuster wants to see.
Step 2: Understanding the Material for DIY Mudjacking
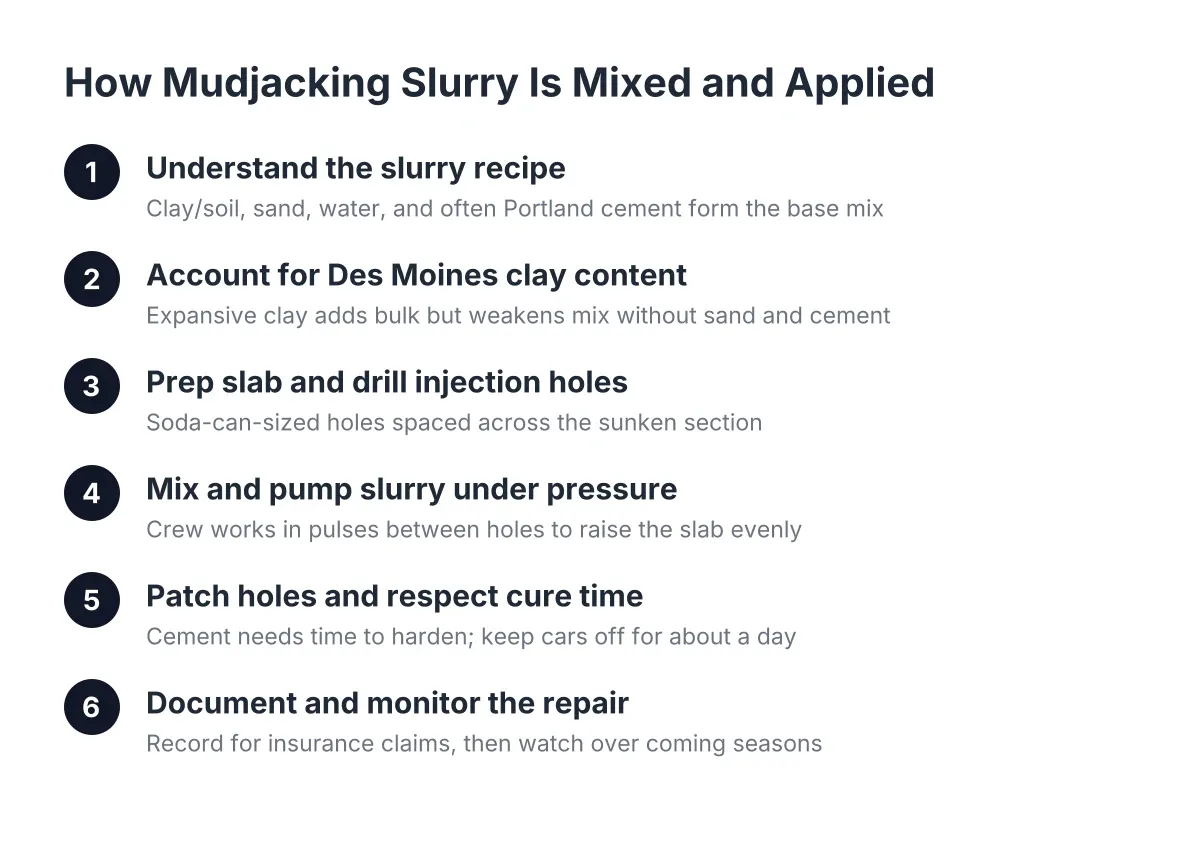
Know your material before you drill anything. Traditional mudjacking slurry is a mix of sand, native soil, water, and usually some Portland cement for strength. Crews sometimes call it "mud," which is roughly accurate. It pumps as a thick liquid, then cures into a dense, packed base.
Three main materials get used for concrete leveling: the traditional mud slurry, stone slurry grout made from pulverized limestone and water, and two-part polyurethane foam. The mud slurry is the heaviest and the cheapest. Foam is lightweight and cures fast but costs more per job. That weight difference is the core of the mudjacking vs polyjacking debate; on soft, saturated clay, adding hundreds of pounds of cured slurry can matter, while on stable base it rarely does.
For a homeowner comparing quotes, the honest framing is this: mudjacking is usually the budget pick for large areas like a driveway, and polyjacking vs mudjacking becomes a real decision when the slab carries heavy loads, needs fast cure time, or sits over soil that will not take more weight.
Step 3: Drill the Injection Holes
Next comes drilling, and this is where mudjacking DIY starts to get real. Crews drill holes about the size of a soda can, usually 1 to 2 inches across, through the full thickness of the slab. Hole placement is not random. Holes go where the lift is needed, spaced so the slurry spreads evenly and the slab rises as one piece instead of cracking at a stress point.
A 4-inch sidewalk slab needs a rotary hammer and a masonry core bit, which you can rent. A 6-inch driveway slab fights back harder. Drill too close to an edge and the corner snaps off. Drill too few holes and the slab lifts unevenly and cracks. Experienced crews read the slab's crack lines and joints before the first hole; that judgment does not come with the rental equipment.
Step 4: Pump the Slurry and Lift the Slab
Now the actual lift. The crew mixes the slurry to a controlled consistency and pumps it through each hole under pressure. The material flows into the voids under the slab first, filling the empty space that let the concrete sink. Once the voids fill, continued pumping builds pressure and the slab starts to rise.
According to Wikipedia, concrete leveling works by drilling holes into the sunken slab, pumping a lifting material beneath it to raise and stabilize it, then patching the holes to match the original surface. That one sentence hides the hardest skill in the trade: pressure control. Pump too fast and the slab cracks or overshoots grade. High-pressure pumping is genuinely difficult to control, and a botched lift can leave the slab worse than before, which is the main reason searching for a mudjacking DIY kit or a rental pump rarely ends well on anything bigger than a single sidewalk square.
The crew lifts in small increments, checking grade constantly with a level or string line, moving between holes so the slab rises flat. On a typical driveway job, the lifting itself takes a few hours. Ask how long mudjacking takes and most answers land in the half-day range for a residential slab, start to finish.
Step 5: Patch the Holes and Fill the Cracks
After the lift, patch every hole with a stiff concrete mix troweled flush with the surface. The patches stay visible as small circles, a cosmetic trade-off that comes with the method. Foam holes are smaller, which is one point in its column if appearance on a front walkway matters to you.
In addition, this is the right time for crack filling. Any crack that opened while the slab was sinking should be sealed so water cannot run through it and wash out the fresh base. Skipping crack repair after a lift is one of the most common reasons a leveled slab settles again within a few seasons, especially with Iowa's freeze-thaw cycles driving water into every open joint.
Step 6: Let It Cure Before You Load It
Give the slurry time to harden. Foot traffic is usually fine the same day, but keep vehicles off a mudjacked driveway until the material fully cures, commonly a day or more depending on weather and mix. Loading it early can push the slab back down and undo the lift.
Note that self-leveling concrete is a different product for a different problem; it smooths the top of an indoor floor rather than lifting a slab from below. If you go that route on a garage floor, follow the manufacturer's prep steps. Manufacturer instructions typically require the concrete surface to be mechanically profiled before the leveler goes down, according to Lowe's, and a respirator should be worn when mixing the dry powder because it is hazardous to breathe, according to Sakrete.
Where DIY Mudjacking Actually Makes Sense, and Where It Doesn't
Can you do mudjacking yourself? For a single sunken sidewalk square, a determined homeowner with a rented drill and a hand pump can sometimes manage a small lift. For a driveway, garage floor, or porch step, the equipment, mix control, and pressure judgment put the job out of reach for most people, and the cost of a cracked slab wipes out the savings.
The money math is the real decider. According to Angi, national mudjacking costs run from $661 to $1,871, with most homeowners paying around $1,232, and small jobs may carry a minimum charge of about $500 even under 100 square feet. HomeAdvisor puts mudjacking at $3 to $6 per square foot, which is 25% to 50% less than replacing the slab entirely. Concrete leveling cost scales by the square foot, so a small job priced against rental fees, materials, and your weekend often comes out closer than the Reddit threads suggest.
Suppose a Des Moines homeowner has two driveway slabs that dropped an inch after a wet spring, and the mail carrier's path across them is now a tripping hazard flagged during an insurance walkthrough. In that scenario, a professional lift likely lands in the high hundreds to low thousands as an estimate, comes with a written scope an adjuster can read, and is done in a morning. A DIY attempt on the same slabs risks a cracked driveway with no paper trail. If your slab sits near a foundation wall, carries a vehicle load, or the cause of settling is unclear, have a professional assess it before anyone drills a hole.
If you need concrete leveling, Des Moines Concrete Leveling Pros can help.
Prefer to talk it through? Call +15155828701 — a quick call is usually the fastest way to get a straight answer for your situation.