Self-Leveling Concrete (Mapei and Others): Prep Steps for Uneven Subfloors
If you have an uneven concrete floor inside your home, self-leveling concrete from Mapei or a similar brand can smooth it out before new flooring goes down. But here is the straight talk: the product is the easy part. The prep work is where most floors succeed or fail, and it matters even more in Des Moines, where our expansive clay soils and freeze-thaw winters keep slabs moving. This guide walks you through the process step by step, so the floor you level stays level, and so you know when a bag of leveler is the right fix and when your slab needs actual concrete lifting instead.
One thing up front, because it matters for safety. If your floor is uneven because the slab underneath has sunk or settled, no bag of leveler fixes that. Self-leveling underlayment smooths dips and rough spots on a stable slab. A sunken slab needs concrete leveling, meaning mudjacking or polyurethane foam injection, to lift it back into place first. We cover how to tell the difference in Step 1.
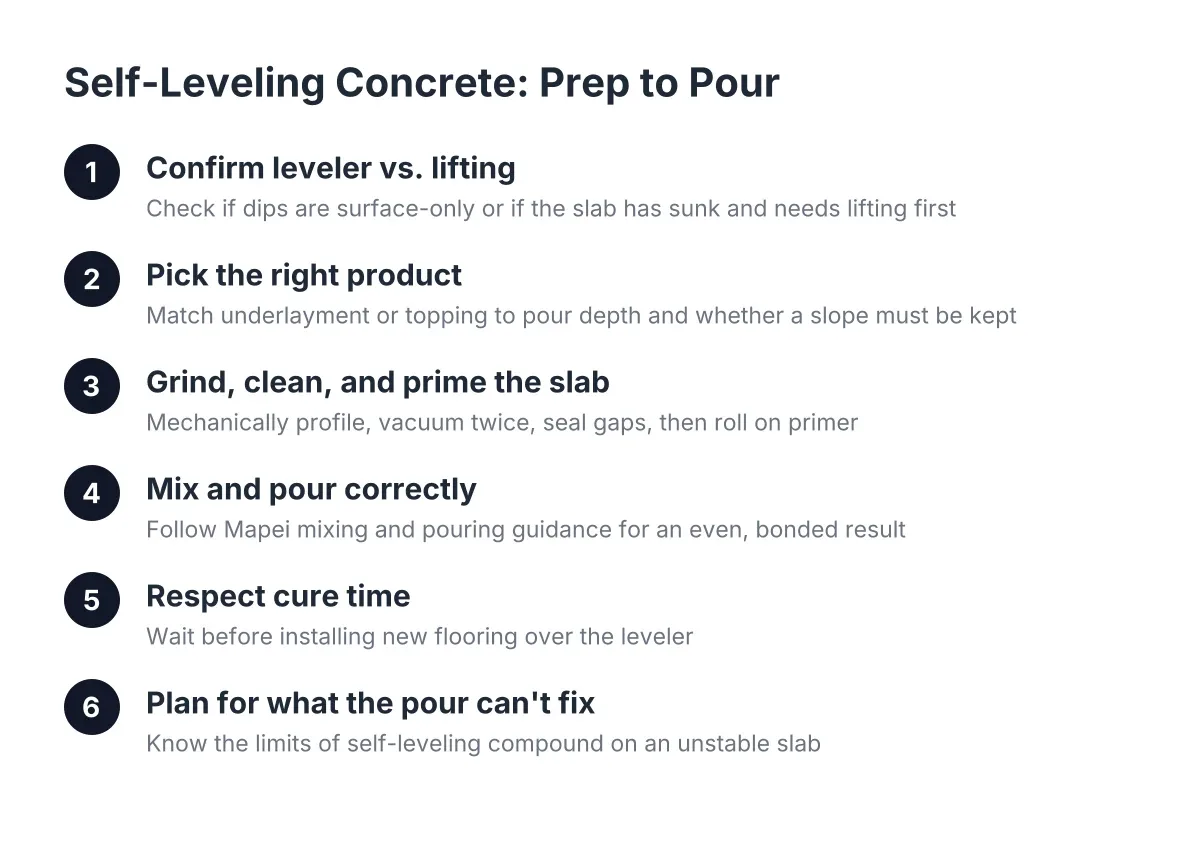
Step 1: Confirm Your Floor Needs Leveler, Not Lifting
Start by figuring out why the floor is uneven. Lay a straight board or a 4-foot level across the floor in several spots. Shallow dips, ridges from old tile removal, or a height mismatch where two rooms join are jobs for self-leveling compound. These are surface problems.
However, some signs point to a slab that is settling, not just rough:
- Cracks that are wider on one side than the other, or that have a height difference across them
- One whole side or corner of the room sloping down
- Gaps opening between the slab and baseboards or walls
- Cracks that came back or got worse after last winter
If you see those, the slab itself has dropped. In central Iowa, that usually traces back to our clay soil shrinking in dry summers and heaving through freeze-thaw cycles. Pouring leveler on a sinking slab is like painting over rust; the problem keeps moving underneath. Concrete leveling works by drilling holes in the sunken slab, pumping lifting material beneath it to raise and stabilize it, then patching the holes to closely match the original surface, according to Wikipedia. Get the slab lifted and stable first. Then, if the surface still needs smoothing, leveler is the finishing step.
This matters double if you are fixing a floor because someone almost tripped. Suppose a grandparent in Beaverdale has a family room floor that dips a half inch near the hallway, and the grandkids catch a toe on it every visit. If the slab is stable, a self-leveling pour fixes that dip in an afternoon. If the slab is sinking, the dip comes back. A quick inspection by a concrete leveling specialist settles the question before you spend money on bags.
Self-Leveling Concrete from Mapei and Outdoor Use
Most self-leveling underlayments, including common Mapei self-leveling concrete products, are made for indoor use under new flooring, not for exposed outdoor surfaces. Sidewalks, driveways, and porch steps face rain, sun, deicing salt, and Iowa freeze-thaw cycles that break down underlayment products fast. Outdoor trip hazards call for a different fix.
For a sunken sidewalk slab or an uneven porch step, the right answer is slab jacking: lifting the concrete back level from below. That removes the tripping hazard without tearing anything out, and it holds through winter because the repair is structural, not cosmetic. Save the bagged leveler for indoor floors.
Step 2: Pick the Right Self-Leveling Product
Not every bag does the same job. Products like Mapei Self Leveler Plus and Rapid Set Concrete Leveler are underlayments, meaning they go under finished flooring like vinyl plank, tile, or carpet. Mapei also makes Ultratop, a self-leveling concrete topping that can serve as a wear surface itself. Read the bag; "underlayment" means it must be covered.
Match the product to your floor:
- Shallow dips under new flooring: a standard self-leveling underlayment works well. Check the bag for minimum and maximum pour depth, since most handle feather edge up to about an inch or more per pour.
- Deeper holes or a room-to-room height mismatch: look for a product rated for deeper pours, or plan two lifts. Height mismatches after a wall removal are one of the most common uses for floor leveling compound.
- A sloped floor you want to keep sloped, like near a floor drain: skip fully self-leveling products. A thicker, semi-self-leveling patch material you can tool by hand holds a slope; a true self-leveler seeks flat and will erase it.
Also buy the primer the manufacturer calls for. This is not an upsell. The primer is what bonds the leveler to your slab, and skipping it is the single most common reason these pours fail and crack loose. On porous concrete, primer also cuts down the air bubbles that rise from the slab into the fresh compound, according to Ardex.
Step 3: Grind, Clean, and Prime the Slab
Here is where patience pays. Manufacturer instructions for self-leveling compound typically require the concrete surface to be mechanically profiled before the leveler goes on, according to Lowe's (Self-Leveler Plus installation guide). In plain terms, the slab needs a light grinding to rough it up so the new material can grip. A rental concrete grinder with diamond tooling handles a residential room.
Next, vacuum the floor. Then vacuum it again. Dust is the enemy of bonding, and one pass almost never gets it all. Scrape off paint, adhesive, and anything loose while you are at it.
Then seal the escape routes. Self-leveling compound flows like pancake batter, and it will find every gap: doorways, floor vents, cracks, and the gap under baseboards. Dam doorways with wood strips, stuff backer rod or foam into cracks and edges, and tape off vents. Crack filling at this stage also keeps the compound from draining into the slab instead of sitting on top of it.
Finally, roll on the primer and let it dry to the state the bag describes, usually tacky or fully dry depending on the product. Pouring onto wet primer or bare concrete both cause bond failures.
Step 4: Mix and Pour Mapei Self-Leveling Concrete the Right Way
Mixing is a timed event, so set up everything before you open a bag. You get roughly 10 to 20 minutes of working time with most products, and Rapid Set Concrete Leveler moves even faster than that.
- Measure water exactly per the bag. Too much water weakens the cured floor and can cause it to dust and crumble later.
- Wear a respirator while mixing; the dry powder is hazardous to breathe, according to Sakrete. Add the powder to the water, not the other way around.
- Mix with a drill and paddle for the full time the instructions state, usually 2 to 3 minutes, until it is lump-free.
- Pour immediately, starting at the far corner and working toward the door.
- Spread with a gauge rake and pass a smoothing tool or spiked roller over it to release trapped air.
For a room bigger than about 100 square feet, line up a helper. One person mixes the next batch while the other pours and spreads, so each batch blends into the last before it stiffens. Cold batches that meet set batches leave ridges, which defeats the whole point.
Follow the Mapei self-leveler instructions on your specific bag over any general advice, including this article. Formulas differ, and the bag wins.
Step 5: Respect the Cure Time Before Flooring Goes Down
Self-leveling concrete dry time runs on two clocks. Most products take foot traffic within a few hours. Full cure before flooring installation takes longer, and it varies by product and by what flooring goes on top. Mapei self-leveling concrete dry time before tile is often much shorter than the wait before vinyl or wood, because moisture trapped under vinyl causes problems that tile shrugs off.
In addition, basements in Des Moines run cool and damp much of the year, and cool temperatures slow curing. Keep the room near the temperature range on the bag and give it air movement. Rushing the flooring on is the second most common failure after skipped primer.
Step 6: Know What the Pour Cannot Fix, and Plan for It
A leveled floor over a moving slab is temporary. If your inspection in Step 1 showed settling, handle the concrete lifting first. The good news for a homeowner on a fixed income: lifting is far cheaper than tearing out and repouring. Mudjacking costs $3 to $6 per square foot and runs 25% to 50% less than replacing a slab entirely, according to HomeAdvisor. Across all methods, the national average concrete leveling cost is $1,174, with a typical range of $630 to $1,723, according to Angi and HomeAdvisor data.
Mudjacking and polyurethane foam each have their place, depending on slab condition, load, cure time, and budget, and a specialist should walk you through which fits your slab in plain terms. Interior floors with ductwork or plumbing below, badly crumbled slabs, or large height drops are jobs to hand to a professional rather than tackle with bags of concrete leveling cement. There is no shame in that; an honest assessment costs you nothing but a conversation, and it beats a floor that fails next spring.
Do the prep right, pick the product that matches the job, and let it cure. Whether it is a bag of self-leveling concrete from Mapei smoothing a family room floor or foam lifting a sunken sidewalk slab out front, the goal is the same: level, safe surfaces the grandkids can run across without you holding your breath.
If you need concrete leveling, Des Moines Concrete Leveling Pros can help.
Prefer to talk it through? Call +15155828701 — a quick call is usually the fastest way to get a straight answer for your situation.